Monday, June 30, 2014

Herbed Ricotta Cakes


 These delightful little crispy nuggets are made with ricotta, Parmesan, chopped fresh herbs and spinach.  They're rolled in breadcrumbs and drizzled with olive oil then baked to a crispy golden perfection.  These are great right out of the oven all crispy and hot or top with your favorite marinara sauce, then sprinkle with grated fontina or Parmesan cheese, Bellisimo!

 Ingredients

Makes 20 2 1/2 inch cakes

1 pound whole milk ricotta cheese drained in a wire mesh for at least 2 hours.
1 cup finely grated Parmesan cheese
1 cup chopped fresh spinach
1 1/2 to 2 cups fresh bread crumbs, plus more for rolling
2 eggs
1 tablespoon fresh flat leaf parsley, minced
1 tablespoon fresh oregano, minced
1 tablespoon fresh basil, minced
1/2 teaspoon salt or to taste
black pepper to taste
olive oil

Optional...
your favorite marinara sauce, heated
Parmesan or fontina cheese grated 

Line a sheet pan with parchment paper and drizzle a little olive oil over pan.
Preheat the oven to 375° F.


In a large bowl, combine the drained ricotta cheese, Parmesan cheese, chopped spinach, minced herbs, eggs,  salt and pepper.  Add 1 1/2 cups bread crumbs and mix together keeping it light.  If mixture is too wet, add up to a 1/2 cup more breadcrumbs, until mixture comes together in a semi moist but not dry mass.


I used a medium sized cookie scoop (2 tablespoons) to form each ball, then dropped them in a bowl with the extra bread crumbs, rolling around to fully coat each ball.  Pat them lightly between your hands forming them into neat little balls.   


Place the balls on the prepared sheet pan, no need to flatten the balls, they will spread into nice even cakes during baking.  Drizzle a little more olive oil over each ball and bake in the preheated oven for 15 minutes.  After 15 minutes, carefully flip the cakes over and bake an additional 15 to 20 minutes until golden brown.


These can be served dipped into your favorite marinara sauce or if you like, arrange hot cakes in a baking dish and top with hot marinara sauce then sprinkle Parmesan or fontina cheese over top and bake in a 375° oven to melt the cheese about 8 to 10 minutes.  Enjoy!


Thursday, June 26, 2014

Gluten Free Strawberry Cake

Strawberry season is finally here and I'm starting it off with a gluten free and a refined sugar free layer cake.  I have family members who have real issues with gluten and I know many out there do as well.  This recipe is made using a gluten free baking mix and the addition of ground almonds, making this a truly moist cake with an airy  texture.  The sweetening agent in this cake is coconut nectar, it comes from the sap of the coconut tree (much like maple syrup).  Coconut nectar has the benefit of being a raw pure sweetener that retains it's nutritional value and it has a low glycemic index.  I used fresh cream and stabilized it with a little gelatine to frost this lovely cake with and as you can see, I got a little carried away with the strawberries...well after all, I've waited a whole year for strawberry season to get here!


Ingredients
The original recipe was found over at Blue Crab Martini
Makes 2 8" layers
For the Cake: 
1 cup all purpose gluten free flour mix
1 cup almond meal
1 tablespoon baking powder
pinch of sea salt
4 tablespoon unrefined coconut oil, melted
2/3 cup coconut nectar, agave nectar can be substituted
3 eggs
2 teaspoon pure vanilla extract 
1 cup diced strawberries 

For the frosting: 
2 cups heavy cream, well chilled
2 teaspoons pure vanilla extract
1 teaspoon plain gelatine 

Optional...
extra strawberries for garnish
toasted sliced almonds for garnish

Preheat oven to 350° F
Grease 2- 8 inch cake pans and line the bottom with parchment paper


Sift the flour mix, almond meal
baking powder and sea salt onto 
a piece of parchment paper, sift
again into a large bowl. 

In a smaller bowl, whisk the eggs 
and add the melted coconut oil, 
coconut nectar and vanilla  Whisk 
to combine.


Combine with a spatula, the wet 
ingredients into the dry ingredients 
in three additions, folding carefully 
until completely combined


Divide the batter evenly between the two prepared cake pans and spread evenly with a spatula.  Sprinkle the diced strawberries over top of batter, dividing a 1/2 cup between each pan.  Press lightly into the batter with your fingers.  

Bake in the preheated oven for 18 to 20 minutes or until the middle of the cake is set and the cake pulls away from the side of the pan.  Remove from the oven and place pans on a wire rack to cool for 15 minutes.  Remove from pans and cool completely.

To make the frosting, in a small ramekin, measure 1 tablespoon of cold water, sprinkle gelatine over the water and allow gelatine to absorb into the water.  Heat carefully in a microwave for 10 seconds or until gelatine dissolves into a liquid.  In a mixing bowl fitted with a whisk attachment, add heavy cream and vanilla.  Whisk on medium speed until cream starts to thicken, then increase speed to high and continue whisking until medium peaks form.  Reduce speed to low and quickly add the liquid gelatine and whisk together until stiff peaks form. 

Fill and frost cake as desired.  I  Spread frosting on the bottom layer and added sliced strawberries than spread more frosting over the second layer and sandwiched the strawberries between the frosted layers.  I enrobed the entire cake with frosting and added rosettes to the edge and filled with strawberries.
I also applied toasted almonds to the base of the cake with a small offset spatula.  Enjoy! 


Consisting of the sap from the coconut tree (much like maple syrup), coconut nectar has the benefit of being a raw, pure sweetener that retains all of the health benefits, while other sweeteners lose most of their nutritional value through heating and processing. - See more at: http://www.22daysnutrition.com/blog/2012/08/22/the-health-benefits-of-coconut-nectar/#sthash.TLWr422s.dpuf

Friday, June 20, 2014

Italian Zucchini Boats


Italian Zucchini Boats are stuffed with onions and garlic and seasoned with fresh basil and parsley.  Feta and Parmesan cheese are added to the mix.  Sprinkled bread crumbs on top give it a nice crispy crust.
It's a little early in Maine for fresh zucchini but garden fresh zucchini is right around the corner.  I purchased my squash at the store and was fortunate to grab the last two on the shelf.  This is one of two ways I love zucchini the best.  The second would be chocolate zucchini bread but that recipe is for a later date.  This recipe calls for 4 medium sized zucchini but as earlier stated, two was all I could find.  I cut the recipe in half for our dinner which you can do easily, however I will tell you, these are great as leftovers also! 

Ingredients
Serves 4

4 medium zucchini about 7-8 inches long
3 tablespoons good quality olive oil, plus extra for drizzling
3/4 cup finely minced onion
3 cloves garlic minced
3 eggs beaten
1/2 cup crumbled feta cheese
3/4 cup freshly grated Parmesan cheese
2 tablespoons fresh parsley, chopped
2 tablespoons fresh basil, chopped
3 tablespoons fresh bread crumbs, finely ground 
salt and pepper to taste
extra bread crumbs and Parmesan cheese for sprinkling 


Preheat the oven to 375° F.

Cut off the stem and the blossom
ends of the zucchini and discard, then cut the zucchini lengthwise.  Scoop out the insides with a teaspoon, leaving a 1/2 inch boarder around the boat.  Place the boats in a shallow casserole dish. 
Chop the insides into little bits. 


Combine the chopped zucchini innards with the onion and the garlic and add a pinch of salt, add olive oil to a heavy bottomed frying pan on medium heat and saute until all liquid is absorbed and the onions are soft.  Remove from the heat.


In a small bowl, whisk the egg and add the feta, Parmesan and the herbs, mix well.  Add the bread crumbs and combine with the sauteed zucchini mixture.  


Season the zucchini boats with a few grindings of pepper and drizzle in a little olive oilFill the boats evenly with the zucchini mixture and use up all the filling.  Sprinkle each filled boat with a little grated Parmesan then sprinkle over the cheese a little fresh bread crumbs.  Drizzle a little olive oil over the bread crumbs and bake in the preheated oven for 35-40 minutes.  Serve hot or at room temperature.  Enjoy!


Friday, June 13, 2014

Ginger Cream Scones with Rhubarb Cherry and Honey Jam

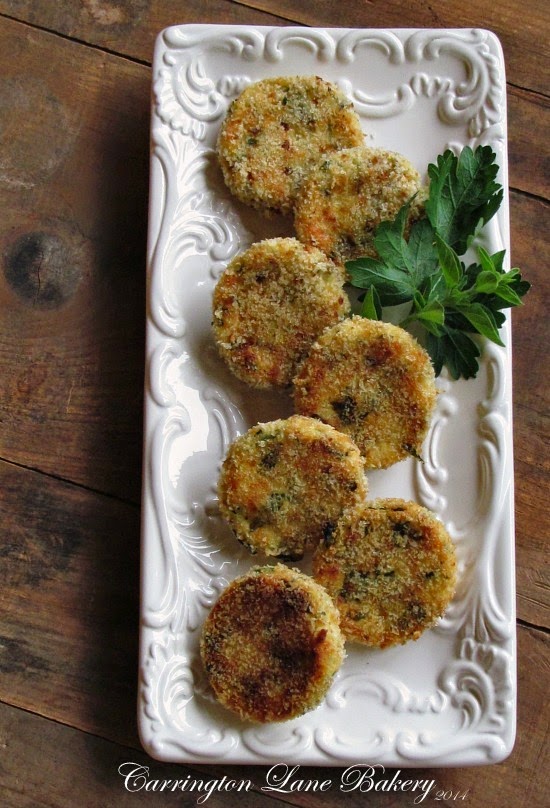
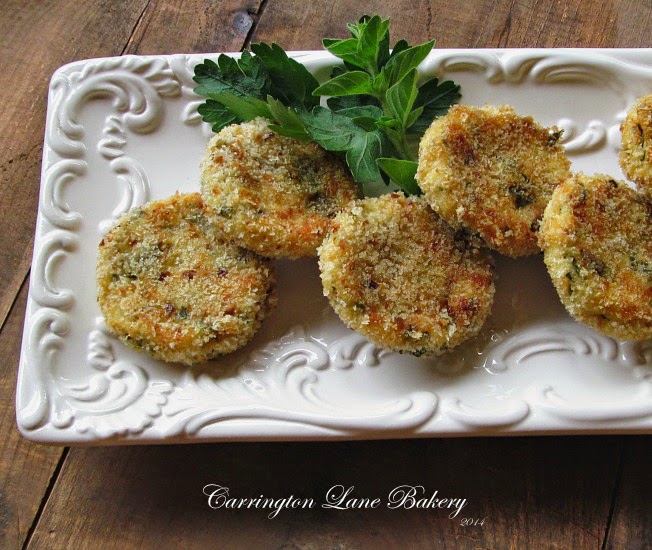
I've combined two recipes in this post, Ginger Cream Scones and Rhubarb Cherry and Honey Jam.  The Ginger Cream Scones are from a traditional recipe with added ginger.  These tender golden gems have a biscuit like texture, buttery and  slightly sweet with a ginger bite.  The Rhubarb Cherry and Honey Jam is a honey sweetened jam, if your like me and love a tart versus sweet jam, this is for you.  I've used a mild tasting local raw honey to the jam, a stronger tasting honey will overpower.  Added fresh or frozen sweet bing cherries adds a little sweetness to the mix not to mention a beautiful bright color.

Ingredients
For the Scones...
2 cups all purpose flour, sifted
1/4 cup granulated sugar
2 teaspoon baking powder
1/8 teaspoon salt
1 teaspoon ground ginger
1/3 cup (5 1/3 Tbs.) cold butter, cut into 1/2 inch bits
2 tablespoons minced crystallized ginger
1/2 cup heavy cream
1 large egg
1 1/2 teaspoon finely grated fresh ginger
1 1/2 teaspoons pure vanilla extract
2 tablespoons heavy cream for brushing on top of scoons
extra sugar for sprinkling, optional

Preheat oven to 425° F.  Line a baking sheet with parchment paper.


In a large bowl, stir together the flour, sugar, baking powder, ground ginger, crystallized ginger and salt.  Whisk together.  Add cold butter bits and with a pastry blender, cut in the butter until it resembles coarse meal.
In a small bowl, whisk egg, add heavy cream and grated fresh ginger, whisk to combine.  Add to the dry mixture and stir with a spatula until combined and mixture starts to come together.


Pour out the dough onto a clean work table.  With your hands, gather together and form into a ball.  Flatten ball into a disk about 8 inches in diameter.


With a sharp knife, cut into 8 wedges.
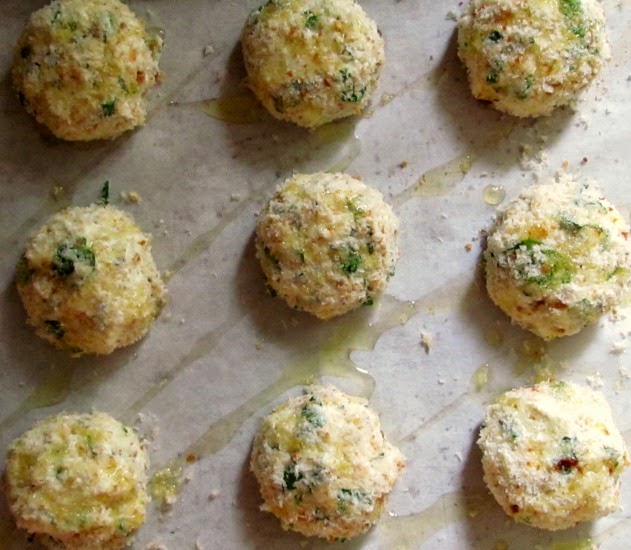
Separate wedges, place wedges on prepared baking sheet and brush the tops with heavy cream and sprinkle with sugar if desired. 


Note: I double pan these as they tend to brown to much on the bottom.

Bake in the preheated oven for 13 to 15 minutes. 

Remove from the oven when golden brown on top and transfer with a spatula to a wire rack.  May be served warm or cool with your favorite jam or good quality butter.  Enjoy!


Rhubarb Cherry and Honey Jam

Ingredients

6 cups rhubarb, cut into 1 inch pieces
2 cups pitted bing cherries
1/4 cup lemon juice
1 cup mild tasting raw honey
2 teaspoons calcium water (see instructions)
3 teaspoons pectin

Makes 6- 8 ounce jars

Prepare your canning jars by washing thoroughly and place them in the rack of a large canning pot filled with hot water.  Bring to a boil and turn off the heat.  Let jars stand in the hot water.  

In a separate pot, bring lids and rings to a boil.  Turn off the heat and let stand in the hot water while preparing the jam.


In a medium sized kettle, (I used a 6 quart pot) combine the rhubarb and cherries with 1/2 cup of water.  Cook over medium high heat, stirring constantly until rhubarb becomes very soft.  Remove from the heat, add the lemon juice.  I used a potato masher to mash the fruit for a smoother texture.


To make the calcium water, measure 1/2 teaspoon calcium powder (from the small packet in the pectin box) with 1/2 cup filtered water in a small clean jar with a lid, shake till dissolved.  Add 2 teaspoons of the calcium water to the rhubarb and mix well.  Save the rest of the calcium water for later use in the refrigerator.  
Mix together in a separate bowl the honey and the 3 teaspoons pectin (from the larger packet) Stir well.


Place the rhubarb on top of the stove and on medium high heat, bring to a boil.  Pour the honey/pectin into the boiling fruit slowly, stirring as you add.  Stir well to dissolve the pectin.  Bring the jam back to a boil, stirring continuously.  Remove from the heat.  Skim off any foam from the top.

Carefully lift the rack out of the water.  Using canning tongs, dump the water from the jar down the drain.  Using a clean canning jar funnel, ladle jam into the hot jar filling up to within an inch of the top.  With a clean paper towel, wipe off any jam that may have spilled on the rim of the jar and place the lid and ring on the jar, tighten securely.  Repeat with the remaining jars.  


Place the jars back into the canning rack and submerse into the pot, adding more water to cover the jars by 1 inch or more.  Bring the water to a boil and process for 10 minutes, turn off the heat.  Place a towel on the counter near the stove and carefully lift the rack out of the pot and place the jars on the towel to cool.  Jam will thicken when cooled completely.  Store unopened jars in a cool dark pantry for up to a year.  Store opened jars in the refrigerator for up to 3 weeks.


Thursday, June 5, 2014

Perfect Brownies


  Fudgy, cakey everyone has their own idea of what a brownie should be.  My idea of a perfect brownie is a little of both.  The perfect brownie must be rich with chocolate, this recipe uses unsweetened and bittersweet chocolates as well as cocoa, after all, it really needs to pack a chocolate punch.  Butter and eggs to give it a moistness, not quite fudge like but not cake like either and espresso powder to add a little sophistication.  What you end up with is fudgy cakey perfection!


We've had a bit of a set back in the weather pattern in Maine these last couple days.  Cold, rainy and gray. 
 I didn't think I'd be lighting the fire in June but here I go again.  

 I was going to do another rhubarb recipe today but because of the sudden cold change in the weather, I've decided chocolate was in order.  This Perfect Brownie recipe will have me feeling warm and right again, before the sun finally makes it's appearance.

Ingredients


1 1/2 cups all purpose flour
1/3 cup plus 2 tablespoons dutch processed cocoa
3/4 teaspoon baking powder
2 1/2 teaspoons instant espresso powder
3/4 teaspoon sea salt
1 1/3 cups (2 2/3 sticks) butter
7 squares (7 ounces) of unsweetened chocolate
1/3 cup bittersweet (dark, not semi-sweet) chocolate chips
5 large eggs, room temperature
3 cups granulated sugar
2 1/2 teaspoons pure vanilla extract

Preheat oven to 350° F  grease a 9X13 pan with butter
Makes 15 squares

1.  In a medium bowl sift flour, cocoa, baking powder, espresso powder and sea salt.

2.  In a medium, heavy bottomed saucepan, on low heat, melt the unsweetened chocolate, bittersweet chocolate and the butter, stir to combine set aside.

3.  In a large bowl, whisk together the eggs.  Add the sugar and vanilla stirring with a whisk just to combine.  Do not over mix.


4.  Stir the warm chocolate mixture into the egg mixture and combine with a spatula, now add the flour mixture and fold the dry ingredients into the wet ingredients just until combined, again, do not over mix.


5.  Pour the mixture into the prepared pan, spread with a spatula and place in the middle of the preheated oven to bake for 35-40 minutes.  After 20 minutes, rotate pan and bake until brownies are set.  When tested, toothpick will have moist crumbs.

6.  Remove from the oven and place on a wire cooling rack to cool completely, before cutting.  Enjoy!